How to Replace a Violin String
Replacing a violin string may seem intimidating at first, but it is a straightforward process that can be done at home with a few simple tools. Here are the steps to replace a violin string:
-
Loosen the old string: Use the tuning peg to loosen the tension on the old string until it is no longer tight. Then, unwind the string from the peg.
-
Remove the old string: Unwind the string from the tailpiece, being careful to unwind it in the correct direction. You can do this by looking at the orientation of the string as it passes over the bridge. Once the string is unwound, remove it from the peg and set it aside.
-
Prepare the new string: Take your new string and straighten it out as much as possible. If the string has a ball end, insert it into the tailpiece and make sure it is securely fastened. If it does not have a ball end, you will need to tie a knot in the end of the string that will keep it from slipping out of the tailpiece.
-
Thread the string: Starting at the tailpiece, thread the new string over the bridge and up the fingerboard, making sure it sits properly in the grooves of the bridge and nut.
-
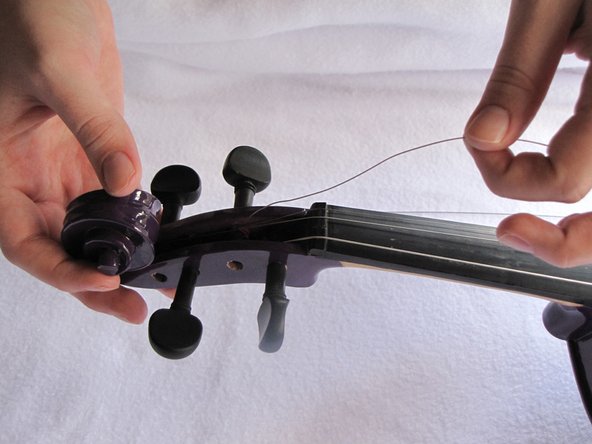
Wind the peg: Insert the end of the string into the peg and begin winding it onto the peg. Make sure you wind it in the correct direction, which is generally clockwise for all strings. Wind the string until it is taut but not overly tight, and make sure the string passes through the groove on the nut before it reaches the peg.
-
Tune the string: Use a tuner or pitch pipe to tune the string to the correct pitch. Start by turning the peg until the string is just taut, and then begin tightening it while checking the pitch regularly.
-
Stretch the string: After the string is tuned to pitch, it is a good idea to stretch it by gently pulling on it with your fingers. This will help it settle in and maintain its tuning.
And that’s it! You’ve successfully replaced a violin string. It may take some practice to get the process down smoothly, but with a little bit of patience and care, you’ll be able to replace strings like a pro in no time.